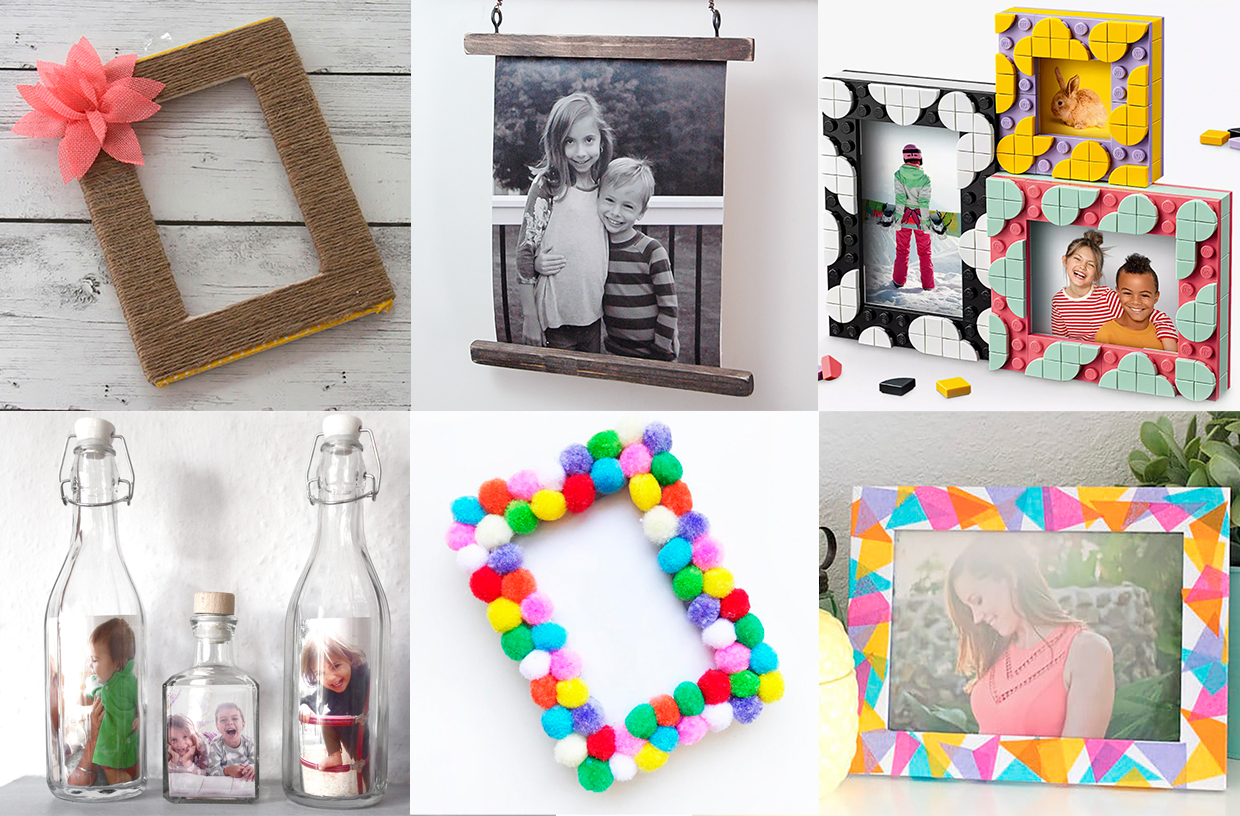
Done with boring, store-bought decor? Making your own frames lets you show off odd-sized postcards and family photos exactly how you want. This post covers using a miter box, picking the right timber, and adding special touches with paint or stains. Get the full details below!
DIY Picture Frames: Simple Ideas
Most people have discovered that diy picture frames offer one of the quickest ways to add warmth to a home. Scraps of wood or old molding are perfect for homemade picture frame ideas that catch the eye.
One of the advantages of custom frames is that you can create one for even the most weirdly shaped items, such as a vintage postcard. These small touches allow you to enjoy creative wall decor that reflects your personal taste.
The best part about diy picture frames is that they are budget-friendly and they ensure that all of your precious memories get the special display they deserve.
Gather the Right Materials, Tools, and Budget Supplies
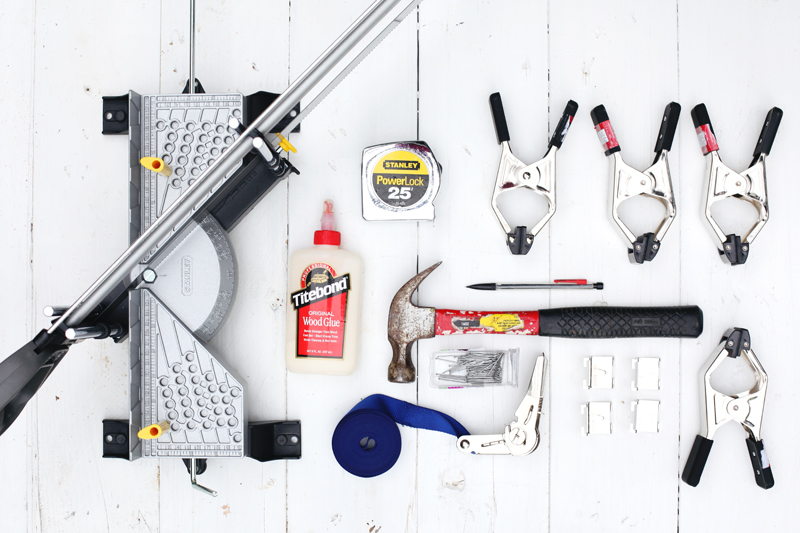
Getting the right stuff together makes building a custom display much easier. Softwoods like pine or poplar are popular picture frame materials because they are easy to cut and sand. Some of the most useful DIY tools you need to get those corners looking sharp include a miter box and a saw.
Once the finish dries, the wood glue and small nails will help to keep everything together. Wood scraps from old projects work well as budget picture frame supplies to save some cash. You can also use old pallet wood or barn siding as recycled frame materials for a rustic look. You also have the option to finish off the final piece with a bit of paint or wood stain.
Plan a Frame Design That Matches Your Style
Starting a project requires an intentional plan to make sure that the final piece fits the room. Picking a look depends on the vibe of the space and what goes inside the border. Sleek metal usually works for modern rooms, while chunky wood fits a rustic feel. You can take a look at different picture frame design ideas to help narrow down the look.
Think about the color and texture of the walls before you pick paint or stain. Using assorted custom frame styles makes sure that the art and the border don’t clash. You can also add small beads or carvings to give the project a unique touch.
Finding the right frame style inspiration helps to keep the theme consistent. These decorative diy frame ideas help to turn wood into a focal point.
Build the Frame Step by Step With Clean, Accurate Cuts
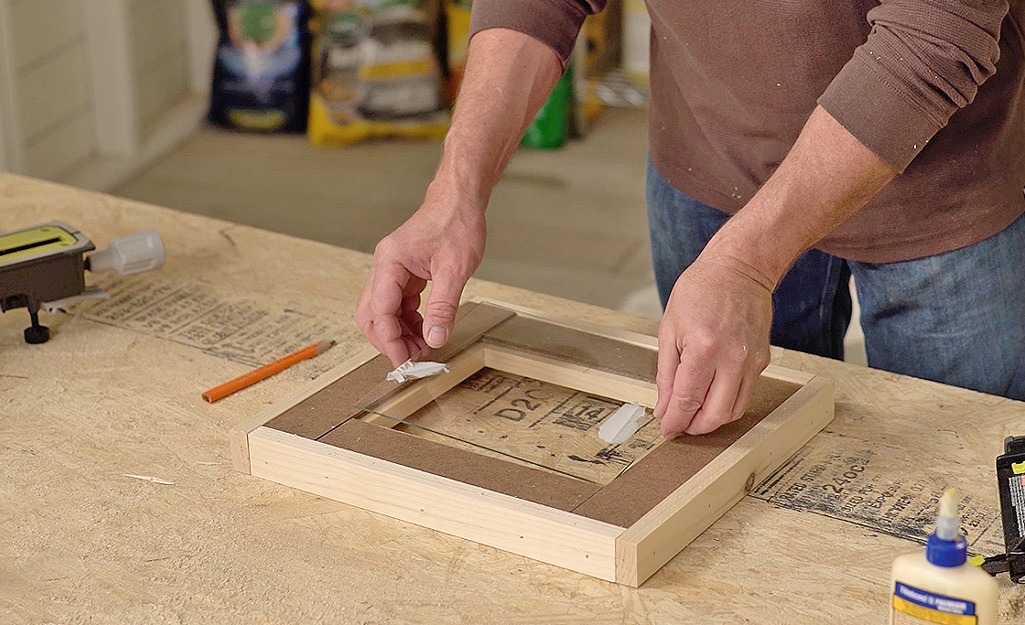
Use a simple tape measure to put accurate marks on the wood. This is one of the most crucial ways of preventing waste. One very important aspect of this diy frame tutorial is that the miters must be tight so that the light doesn’t peek through the cracks.
You can use a square tool to check if each corner is aligned perfectly. Learning how to build a picture frame is mostly about taking time with those initial cuts. A great way to add strength to the joints is by applying wood glue and using small nails. Each step of the frame cutting and assembly brings the vision closer to reality.
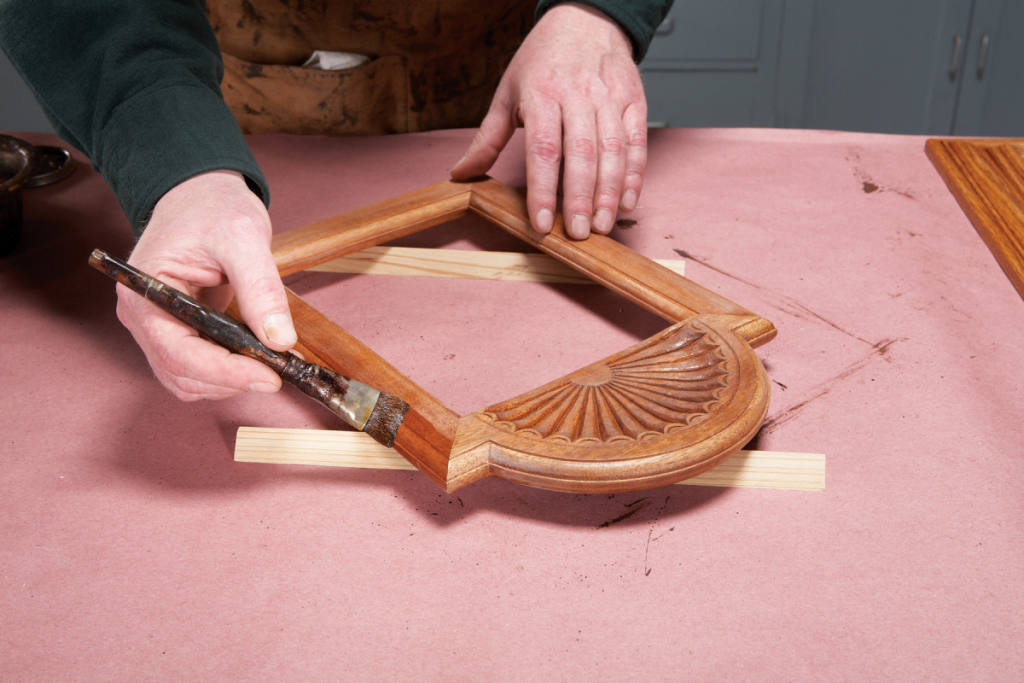
Decorate the Frame With Paint, Texture, and Embellishments
You can change a store-bought border into a piece of art with just a few simple tools. Trying out different painted picture frame ideas lets the personality of your home shine through.
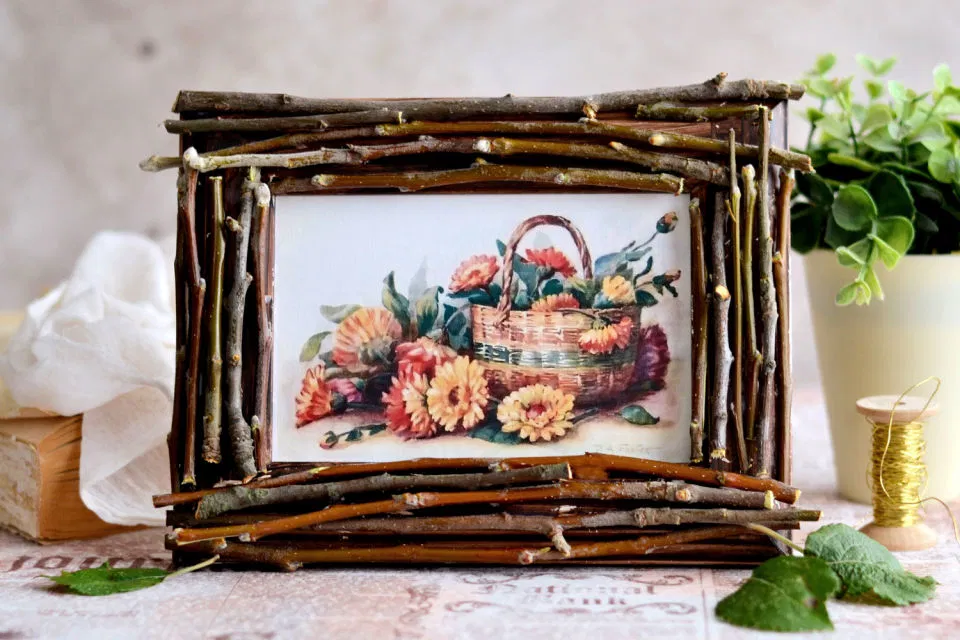
Small twigs or dried flowers glued to the sides act as lovely custom frame embellishments that help to put together a nature-inspired look. You can also use a distressed frame to add a warm and lived-in feeling to your modern living space.
It takes very little effort to decorate diy picture frames with metallic leafing for a touch of luxury. Applying a matte sealer helps the finish last much longer.
Finish the Frame Properly for Long-Lasting Results
Moisture in the air usually ruins bare wood, so you should try to seal the corners of your diy picture frame with a quality varnish. If you don’t want the art inside to fade or get scratched over time, then it’s a good idea to add glass or acrylic glazing. This is a very simple step that helps to protect your handmade frames from general wear and tear.
You only need to learn a few simple frame finishing techniques to make the wood look rich and high-end. Proper weight distribution is also key for safety and a level display. It is also smart to choose sturdy picture frame hanging hardware that can support the actual weight of the materials.
Fix Common Frame Problems Without Starting Over
Finding a gap in a corner is one of those common picture frame mistakes that can happen to anyone. A bit of wood filler and a light sanding session usually hides the gap so that the joint looks solid. If a corner feels wobbly, then you can add some wood glue and a corner clamp as part of your diy frame troubleshooting process.
It’s possible that there are uneven picture frame edges that won’t stay flush during assembly, and you can use wood glue to fix that. These quick frame repair tips help to save the day and keep your project moving forward without needing to toss the whole thing in the trash.
Use Creative Frame Ideas to Inspire New Projects
Searching for diy picture frame inspiration is easy when checking out architectural details or even old window panes. You get a fresh way to display your memories when you transform discarded moldings into sleek borders. Those creative frame project ideas frequently turn into long-term hobbies that fill every corner of a living space with warmth.
Adding elements like seashells or geometric wood cutouts produces unique photo frame designs for any aesthetic. Trying out different homemade wall frame ideas allows for total control over the size and color of the display. The single piece that you finish might just be what gives you the motivation you need to start a complete room makeover.
Expand Your DIY Skills Beyond Picture Frames
When you learn how to cut accurate angles and apply finishes, it opens up a world of possibilities for you. Being able to develop these diy home decor skills means that your future repairs or upgrades will look very polished.
Using a miter box for a photo display is a great gateway into creating sturdy bookshelves or window trim. Such beginner diy home projects give the hands-on experience required to handle more daunting structural changes.
Mirror borders and shadow boxes are perfect projects after picture frames because they use the same standard principles of construction. All of these easy home craft ideas will gradually turn you into a confident handyman.
Conclusion
Starting a project like this turns a blank wall into a space that tells a story. Creating something from scratch allows you to have total control over how memories look on the wall. This diy picture frame guide helps you to turn plain wood into something special. These framing choices make a big difference in how the room feels.
These handmade frame ideas show that spending a lot of money isn’t necessary for a high end look. These frames come in so many combinations. Making a custom photo display is a fun way to spend a Saturday afternoon. These types of simple home decor projects prove that a little effort goes a long way.
Put up some handcrafted frames in your home and share the finished look in the comments below!

