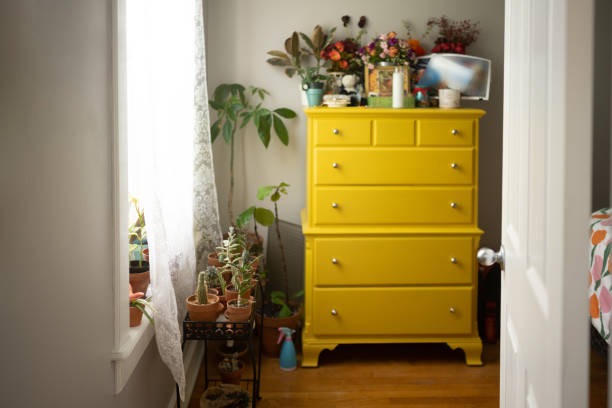
Transforming an old dresser into something beautiful is one of those projects that feels both exciting and deeply satisfying.
A vintage dresser makeover is not just about improving appearance; it is about breathing new life into something with history.
When you explore DIY furniture transformation, you quickly realize how much freedom you have. You can go bold with color, soft with pastels, or elegant with natural wood finishes. There is no strict rule, only your imagination guiding you. Many homeowners love experimenting with upcycled dresser ideas because they offer a budget-friendly way to upgrade a space while also reducing waste.
With the right approach and a few clever furniture makeover tips, even a beginner can achieve results that look professionally done. Think of it as a fun journey where every step brings you closer to a one-of-a-kind masterpiece that tells a story.
Discover the Beauty of Vintage Furniture
Vintage furniture carries a charm that modern pieces often struggle to replicate. These dressers were made with care, attention to detail, and solid materials that stand the test of time.
That is why so many people fall in love with the natural vintage furniture charm found in older pieces. These qualities make them perfect for creative upgrades and inspire endless antique dresser ideas that can suit any home style.
Transforming old pieces is also a wonderful way to embrace sustainability. Instead of buying new, an old furniture makeover allows you to reuse what you already have while reducing waste. This approach not only saves money but also adds character to your home.
Vintage pieces also blend beautifully with modern interiors. A thoughtfully restored dresser can become the highlight of your vintage home decor, creating a warm and inviting atmosphere that feels both timeless and personal.
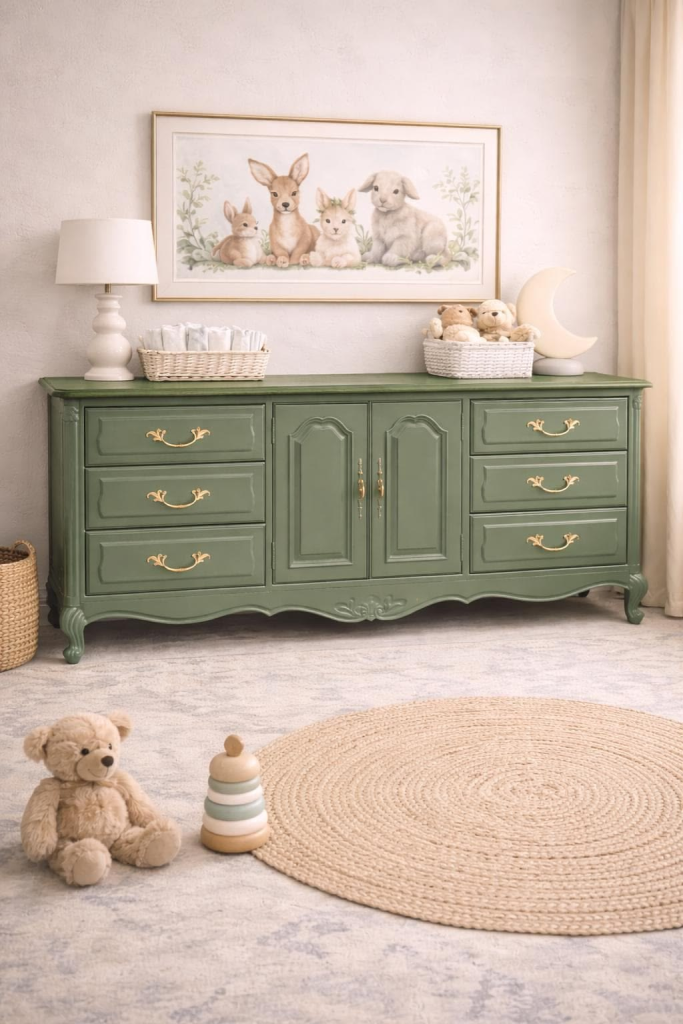
Plan Your Design Style and Inspiration
Planning your style makes the entire process smoother and more enjoyable. There are countless dresser design ideas to explore, from bold statement pieces to soft and subtle finishes.
Choosing inspiration is one of the most fun parts of the project. You might scroll through photos, visit local shops, or even look at pieces in your own home. Gathering furniture makeover inspiration helps you narrow down your preferences and avoid confusion later on.
Here are some popular style directions to consider
- A shabby chic dresser look with soft colors and lightly worn edges for a cozy feel
- Clean and sleek finishes inspired by modern vintage furniture that blends old and new
- Rustic styles that highlight natural wood and earthy tones
- Minimalist designs with simple colors and smooth finishes
Once you choose your style, try to keep every decision aligned with it. This includes paint color, hardware, and decorative details. A clear direction helps your dresser feel polished and thoughtfully designed.
Set Your Budget, Timeline, and Project Goals
Starting a DIY project without a plan can quickly become overwhelming. That is why setting clear goals is so important. Begin by deciding how much you are willing to spend on your DIY furniture budget. This helps you make smart choices when buying materials and tools.
Planning your time is just as important as planning your money. A realistic schedule keeps things enjoyable rather than stressful. Use simple project-planning tips to break your work into smaller steps so you can easily track your progress.
Consider these helpful ideas
- Create a simple checklist of tasks from start to finish
- Set aside specific days or hours for working on the project
- Allow extra time for drying and unexpected delays
Having a clear furniture makeover timeline keeps you focused and motivated. You will know exactly what needs to be done and when.
Good DIY project organization also means setting clear expectations for the final result. Whether you want a bold statement piece or a subtle upgrade, knowing your goal makes every decision easier.
Gather Essential Tools and Materials
A successful makeover begins with having the right tools and materials ready. You do not need anything too complicated, but quality supplies can make a big difference. Investing in reliable DIY furniture tools ensures smoother work and better results.
Basic items you will likely need include
- Sandpaper in different textures for smoothing surfaces
- Paint brushes and rollers for even coverage
- Clean cloths for wiping and polishing
- Screwdrivers for removing and attaching hardware
When it comes to painting, having proper painting supplies for furniture helps you achieve a professional look. Good quality paint and brushes reduce streaks and make application easier.
For those who prefer a natural look, wood finishing materials like stains and sealers are perfect for enhancing the beauty of the wood.
Keeping your dresser makeover tools organized in one place saves time and keeps your workspace neat. It also helps you stay focused and enjoy the process without unnecessary interruptions.
Prepare the Dresser: Cleaning and Surface Prep
Preparation is the secret behind every beautiful furniture transformation. Skipping this step often leads to uneven results, so it is worth taking your time. Following proper furniture preparation steps ensures that your paint or stain adheres well and lasts longer.
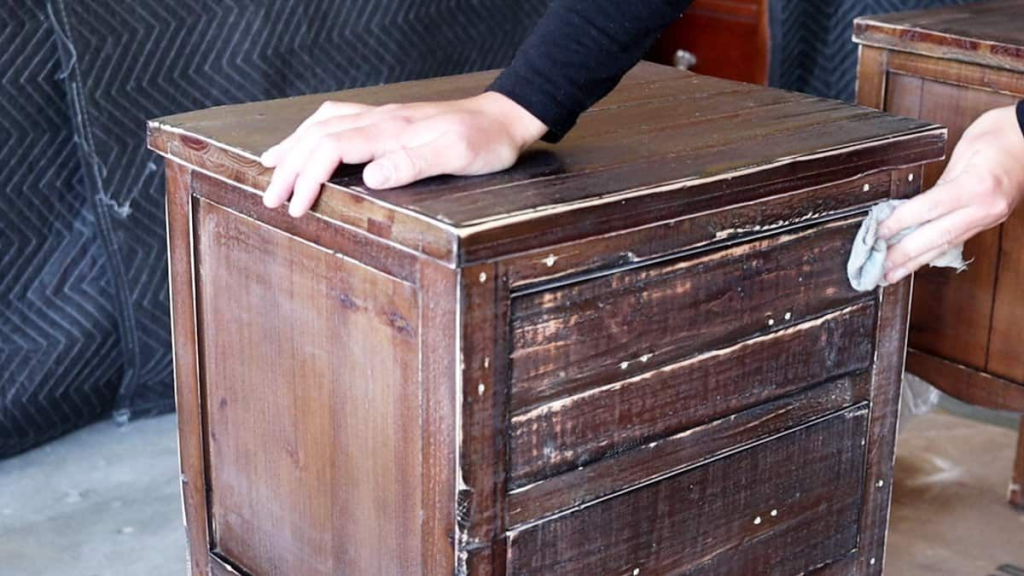
Start by giving your dresser a thorough cleaning. Dust, grease, and old residue can interfere with the finish, so focus on cleaning old dresser surfaces carefully.
Next comes sanding, which smooths out imperfections and creates a surface that paint can stick to. Take your time with sanding wood furniture to achieve an even texture.
Here are a few helpful preparation tips
- Remove drawers and hardware before starting
- Fill in scratches or dents with wood filler if needed
- Wipe away dust after sanding to keep the surface clean
Good surface prep and DIY practices may not be the most exciting part, but they are essential for a polished, long-lasting finish.
Apply Paint, Stain, and Finishing Techniques
Now comes the fun part, where your vision starts to come to life. Choosing the right finish can completely change the look of your dresser. Exploring different furniture painting techniques allows you to create anything from bold and modern to soft and vintage inspired styles.
If you prefer a natural appearance, wood staining tips can help you highlight the beauty of the grain while adding depth and richness.
For those who love a rustic feel, creating a distressed furniture look adds character and charm. This technique gives your piece a slightly aged appearance that feels warm and inviting.
To achieve the best results
- Apply thin layers of paint or stain rather than thick coats
- Allow each layer to dry completely before adding another
- Lightly sand between coats for a smooth finish
Finally, seal your work using reliable furniture finishing methods to protect it from wear and tear. A good seal keeps your dresser looking fresh for years to come.
Upgrade Hardware For a Fresh Look
Sometimes, the smallest changes make the biggest difference. Swapping out old knobs and handles can instantly transform the look of your dresser. A simple dresser hardware upgrade can take your piece from outdated to stylish in minutes.
There are many cabinet knobs ideas to explore, from vintage inspired designs to sleek modern options. Choosing hardware that matches your overall style helps tie everything together.
If you prefer a contemporary feel, consider installing modern drawer handles that add a clean and polished look.
Different furniture hardware styles can completely change the personality of your dresser, so do not be afraid to experiment until you find the perfect match.
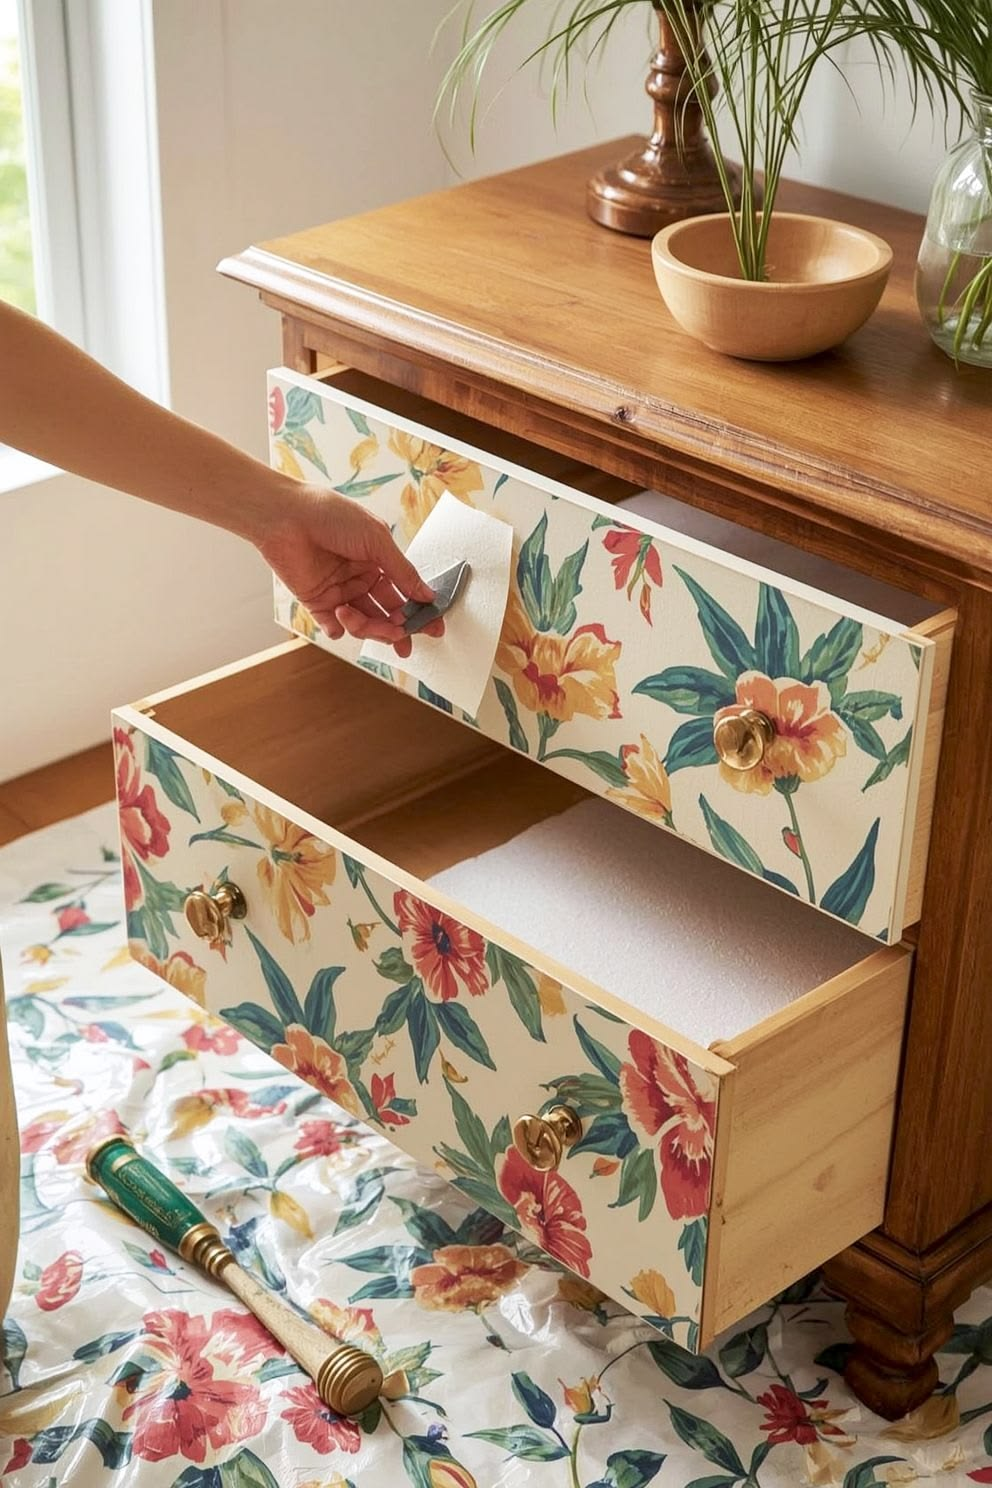
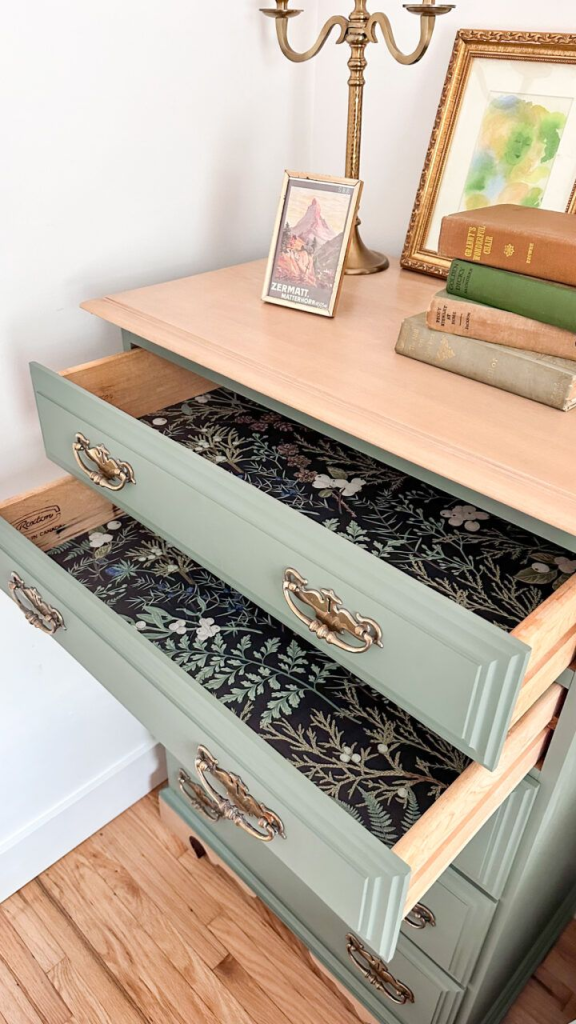
Add Personal Touches and Decorative Details
This is where your creativity truly shines. Adding unique details turns your dresser into something that feels personal and special. With a little imagination, DIY furniture decor can elevate your piece from simple to stunning.

Think about ways to make your design stand out
- Use stencils to create patterns or designs
- Add decorative trims or borders
- Experiment with color combinations for a bold look
A thoughtful custom dresser design reflects your personality and makes your furniture one of a kind.
Small details like painted accents or artistic touches can become beautiful creative furniture accents that draw attention and admiration.
By incorporating elements that mean something to you, you create personalized home decor that feels warm, inviting, and truly yours.
Fix Common DIY Mistakes and Challenges
Every DIY project comes with a few bumps along the way, and that is completely normal. Learning how to handle these situations makes the process less stressful. Understanding common DIY furniture mistakes helps you avoid frustration and stay confident.
Paint issues are among the most common problems. Uneven coats or streaks can usually be corrected by sanding lightly and reapplying. Knowing simple methods for fixing paint issues can save your project.
Here are a few practical tips
- Allow enough drying time between coats to prevent smudging
- Use even strokes when painting to avoid streaks
- Double check measurements before installing hardware
If something goes wrong, do not panic. Most furniture makeover problems can be fixed with patience and a little creativity.
Keeping a calm mindset and using smart DIY troubleshooting tips will help you turn mistakes into learning experiences rather than setbacks.
Maintain Your Transformed Dresser for Long Term Use
Once your dresser is complete, taking care of it ensures it stays beautiful for years. Following simple furniture maintenance tips helps protect your hard work.
Regular cleaning is key. Use gentle methods for cleaning painted furniture to avoid damaging the finish. Avoid harsh chemicals and stick to soft cloths and mild cleaners.
Protecting the surface is also important. Applying protective layers and using coasters or liners can help in protecting wood finish from scratches and stains.
To keep your dresser looking fresh
- Wipe spills immediately to prevent damage
- Touch up small scratches as they appear
- Keep the dresser away from excessive moisture or direct sunlight
Practicing long lasting furniture care ensures your piece continues to shine and serve its purpose beautifully over time.
Conclusion: Give Old Furniture a New Life with DIY Creativity
Transforming a vintage dresser is more than just a project, it is an experience filled with creativity and satisfaction. Exploring different furniture upcycling ideas allows you to see the potential in items that might otherwise be overlooked.
With a bit of effort and imagination, a simple dresser can become a stunning centerpiece. This kind of DIY home improvement not only enhances your space but also gives you a sense of pride in what you have created.
Every successful project tells a story, and your vintage makeover success becomes a reflection of your personal style and dedication. In the end, these creative furniture projects remind us that beauty can be found in unexpected places, and sometimes all it takes is a little vision to bring it to life.

