Turn plastic bottles into polished organizers, planters, and décor that look custom. This guide walks you through practical patterns, tips that will help reduce your waste, and how to make crafts safe for kids. The goal is to help you to build beautiful upcycles that are also budget-friendly by using what’s already at home.
Plastic Bottle Crafts: Creative Upcycling Ideas
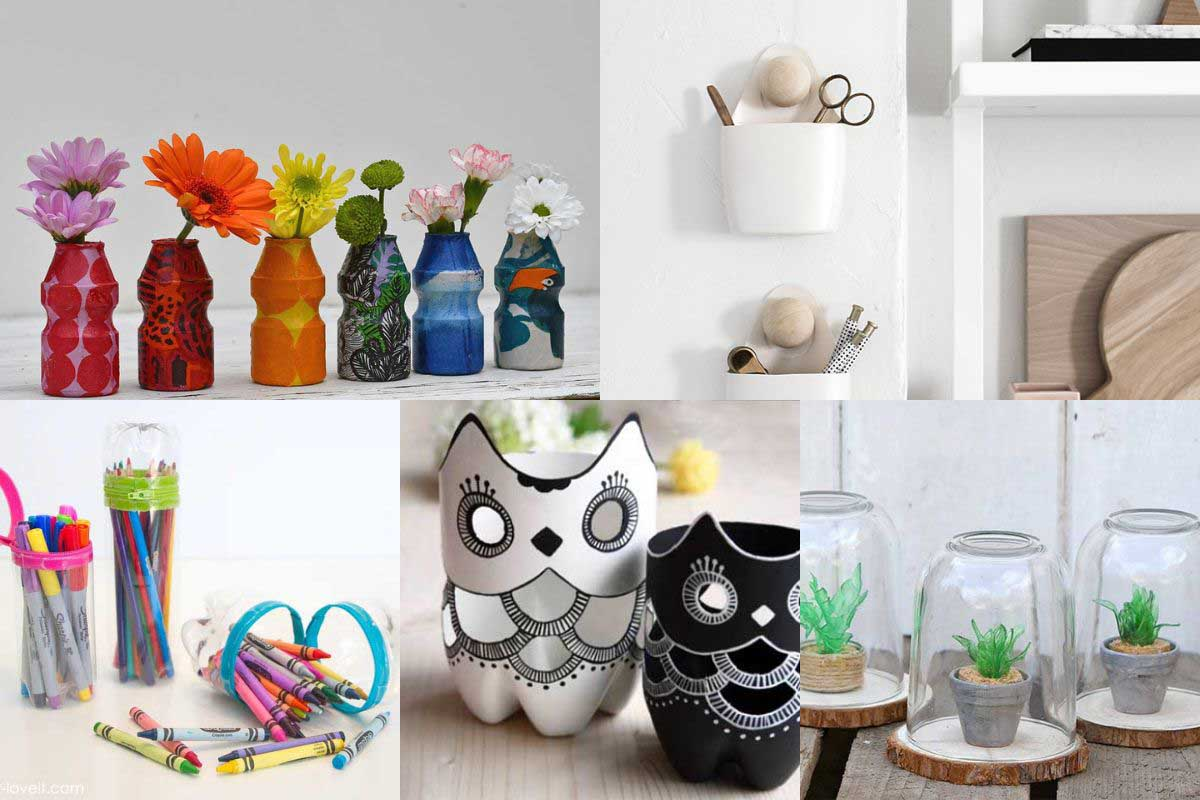
If you’re a lover of plastic bottle crafts, then you’ll realize that those old bottles you have at home still have a lot of potential. You can make them into organizers, vases, and seed starters that can beautify your environment. This section will open your eyes to many creative recycling ideas that can help you to make use of your simple tools to create very beautiful decor.
You’ll find that it is very easy to create sustainable bottle art once you have score lines for accuracy, edges that have been properly sanded, small pilot holes for hardware, and acrylic paint.
Why Upcycling Matters: Planet & Wallet

Upcycled bottles skip the trash and highlight the real environmental benefits of upcycling. Sort the bottles by size and shape and you’ll notice that it helps reduce the plastic waste at home while also setting up an easy workflow for your crafts. That same workflow is what fuels circular economy crafts, helping to keep materials in use without the need to purchase new ones.
A light sand and a coat of paint is all you need to transform jars into recycled decor that are budget-friendly and feel custom. A single shelf of finished pieces can start a micro shop that covers craft costs.
Finding Inspiration for Bottle Projects
Before you even start with the build, get a book and put down colors, textures, and a few simple sketches. This will help to keep your choices honest before you get started with the process of cutting or painting. A good idea is to take a look at several plastic bottle projects and bookmark the shapes that are usually repeated.
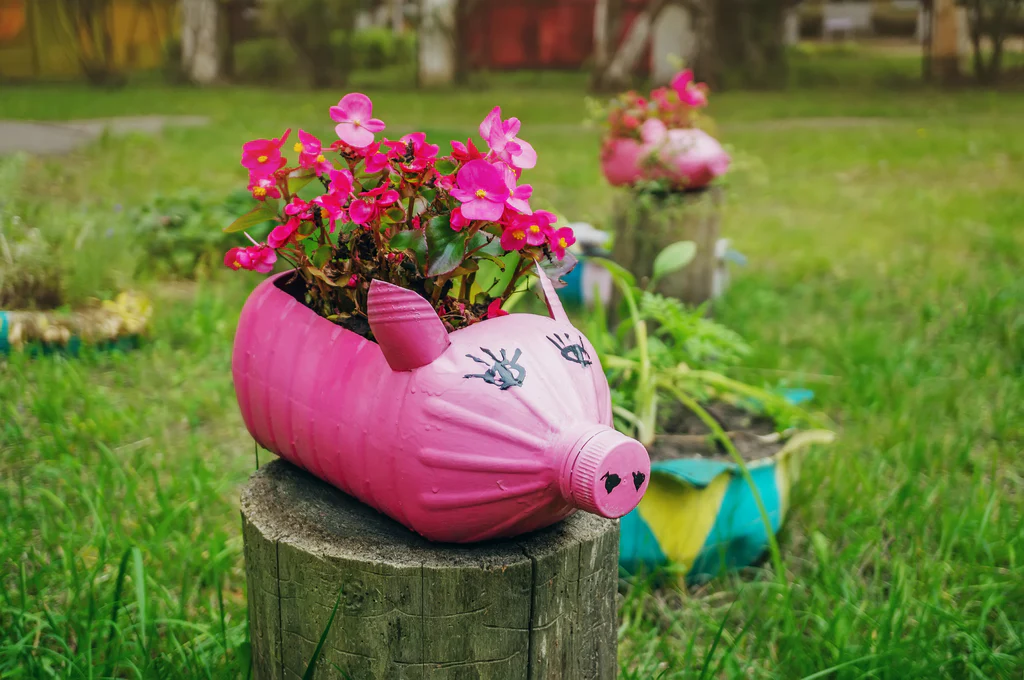
If you are trying to find the best way to incorporate greenery, you can make use of DIY bottle planters. However, you have to ensure that you match cuts that are soil-friendly to the appropriate pot size and desired palette.
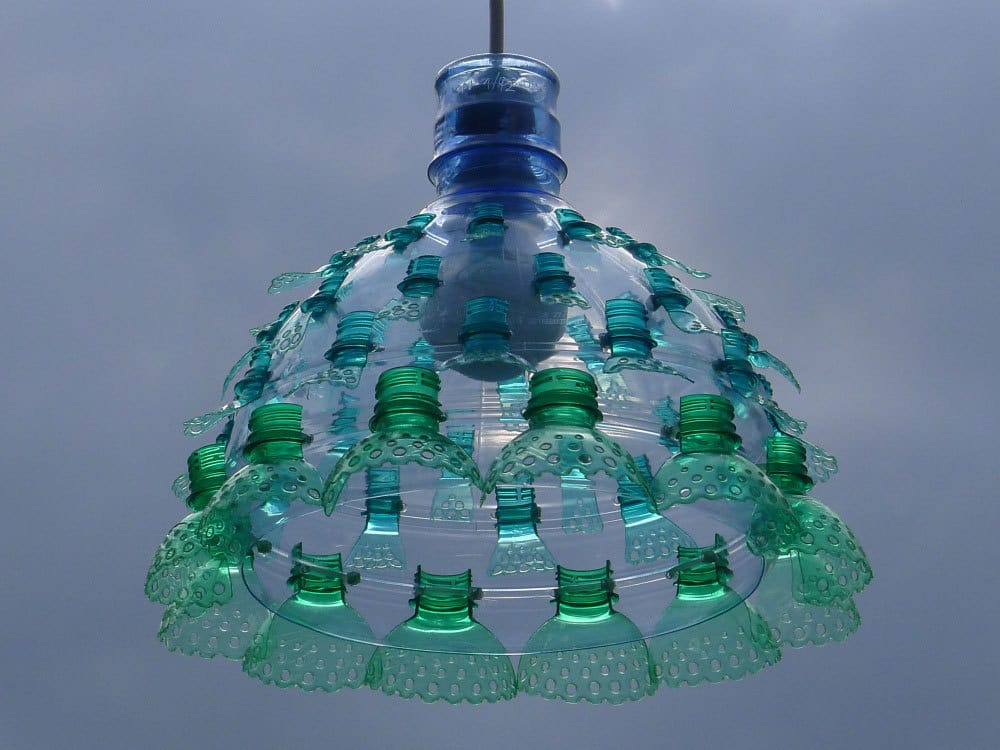
When it comes to giving your ceiling the glow it deserves, take note of the materials and the appropriate spacing for a chandelier from bottles. Once you have the modules mapped out from the recycled art inspiration you have gathered, the next thing for you to do is to sort out the drawers and decks so that all the organizers can come out in their proper sizes.
Author’s Note: Check out our post on creating Upcycled Light Fixtures: Creative DIY Lighting Ideas for even more on upcycling!
Tools & Materials That Make It Easy
You will have no problem getting clean cuts when you have sharp shears and a craft knife. If you want to ensure that your plastic is cut properly, you must always ensure that your tools are razor sharp. You can make use of a hole punch on bottles that are very thin, and make use of a drill if you are facing thicker walls.
It’s best to go for craft adhesives that are non-toxic, especially those that have an ASTM D-4236 statement, as this shows that there has been a toxicologist review. Another important thing for you to note is that you have to sand lightly, and make use of acrylic paint so that you can get the best grip and color. If you need to add a few embellishments to your recycled crafts, you can go for beads, cords, or buttons.
Step-by-Step: Popular Starter Projects
There are many simple projects that you can get started with. Here is a simple self-watering planter tutorial you can follow: Start by scoring a cut line, split the bottle, pierce the cap, add a cotton wick, flip the top into the base, add soil, and water the reservoir.
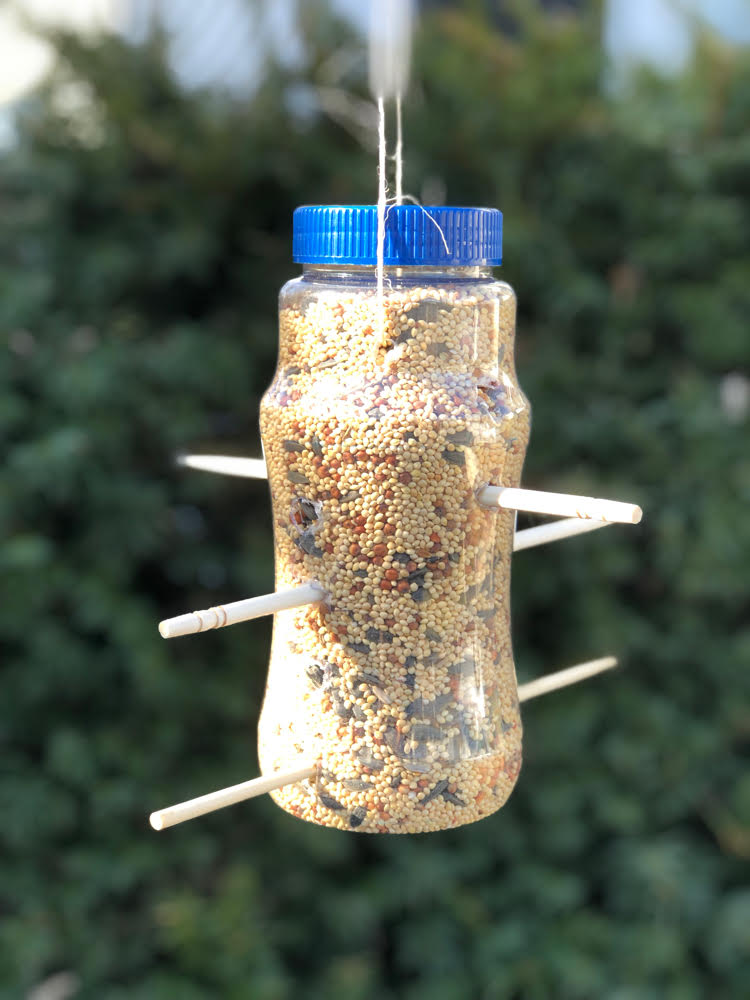
If you want to work on a plastic bottle bird feeder, the first thing to do is to measure perch holes that are level, cut tiny seed openings right above, fit the perches, fill, and then go ahead to hang through two top holes.
Design & Personalization Techniques
Good adhesion doesn’t come with luck. It is as a result of good washing, fine sanding, and a plastic primer. If you want to achieve bottle designs that are hand painted, all you have to do is simple paint motifs or tidy stripes. You have to keep the layers thin so that the coverage is as smooth as it needs to be.
You can reduce the chance of wrinkles when you decoupage printed paper and smooth outward, and then edge using a contrasting line so that you get polished mixed-media bottle art.
If you don’t want to stop there, you can go ahead and add textured finishes on the plastic bottle by using gesso combs, tissue creases, or twine curls, and then dry brush. You can display the custom recycled home accent in any room once you have sealed it with a clear acrylic spray.
Troubleshooting Common Craft Issues
You don’t have to worry too much when you see uneven paint on your plastic. It’s easy to fix with some cleaning and priming. When you use heat shaping techniques that are safe, such as using light, even heat together with a support form, you’ll notice that warping improves a lot.
It can be a pain to work on joints that peel, but one option you have available to fix them is by reinforcing flimsy structures using overlapping seams, stitched ties or staples, and glue fillet that is thin.
Sustainable Practices from Start to Finish
It is possible to stick with sustainable practices from the beginning to the end of your upcycling project. First, you have to ensure that you rinse the bottles properly and take out any residues that are left over in them.
Another very important thing you have to take note of is that your tools have to stay clean so that they are able to cut through the plastic easily. When you’re working on your project, it’s best to make use of craft supplies that are eco-safe. Also when it comes to paint options, it’s best to go for those that are water-based so that you can easily clean them up using soap and water.
Put together trims and punch them into beads or fillers, as this is a great way to develop a zero-waste crafting habit while also ensuring that there are no scraps put into the bin. Save tops and bits of paper and then you can give caps and labels a second opportunity to shine as mosaics, tags or stencils.
Safety & Prep Essentials
The success of every craft starts with ensuring appropriate safety steps are put in place. There are a few steps you need to take before you even get started with your plastic bottle craft. These include rinsing the old bottle thoroughly and then disinfecting it by using a mild bleach solution. This is usually sufficient to ensure that the paint is able to stick properly and that there are no odors on your finished project.
If you want to take out the labels, put the bottle into warm and soapy water and then gently remove the residue by using a little rubbing alcohol or oil. Cut away from the body, and wear safety glasses and gloves while you work.
Community Wins & Success Stories
Many schools usually hold recycling art fairs where classes are given the responsibility to create different bottle crafts such as flowers, chandeliers, and mobiles. Depending on how good these crafts are, they can be on display all through the term.
There are also a lot of free community upcycling workshops that share patterns that others can use such as planters and bed feeders.
You can start your upcycling journey today with just one empty bottle that is tucked away somewhere in your home. Once you start the project, take pictures as you go on and put down quick notes so that when you have to build in the future it goes a lot faster.
Building simple habits like this will make you get used to the sustainable DIY lifestyle. Don’t keep your creations to yourself, post detailed steps so that others are able to try them out. Upcycle one bottle today and post the results in the comments below!

