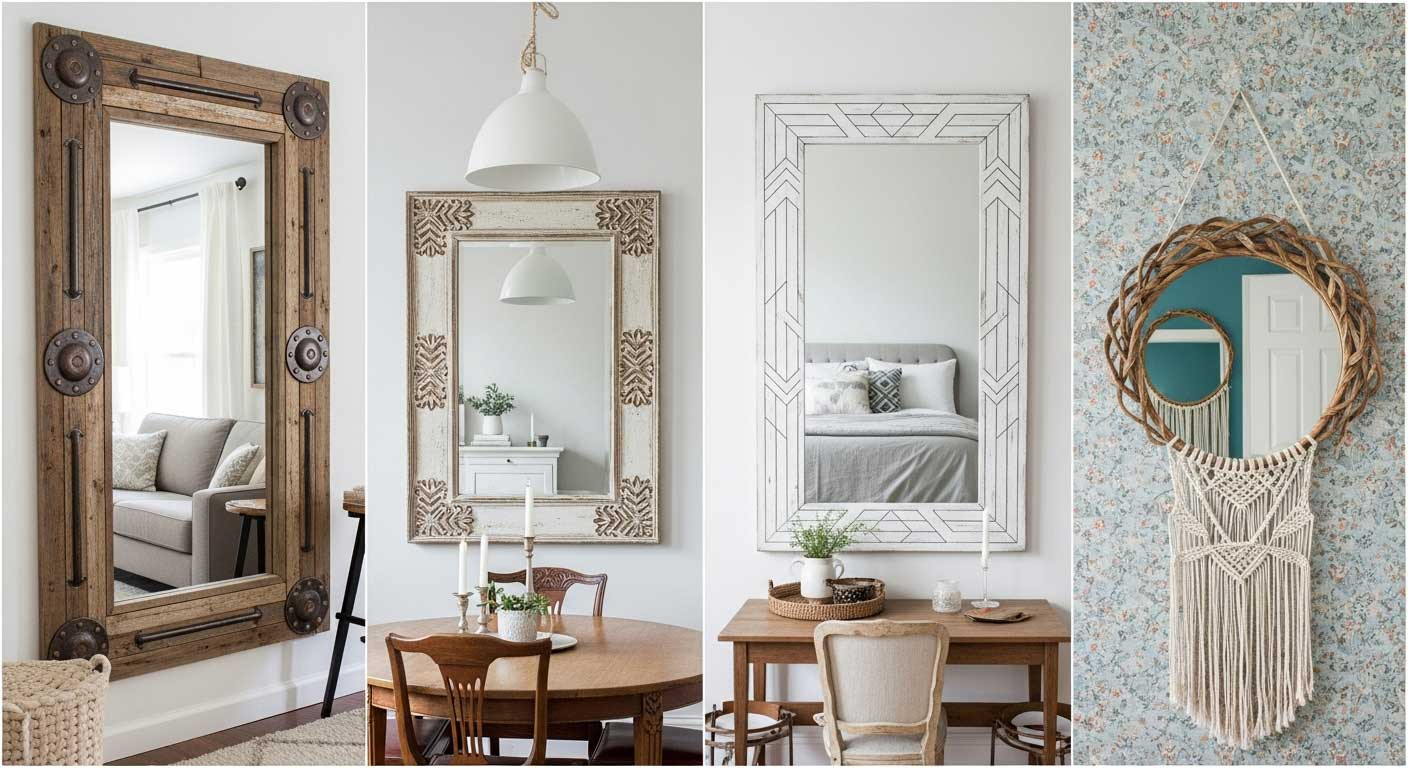
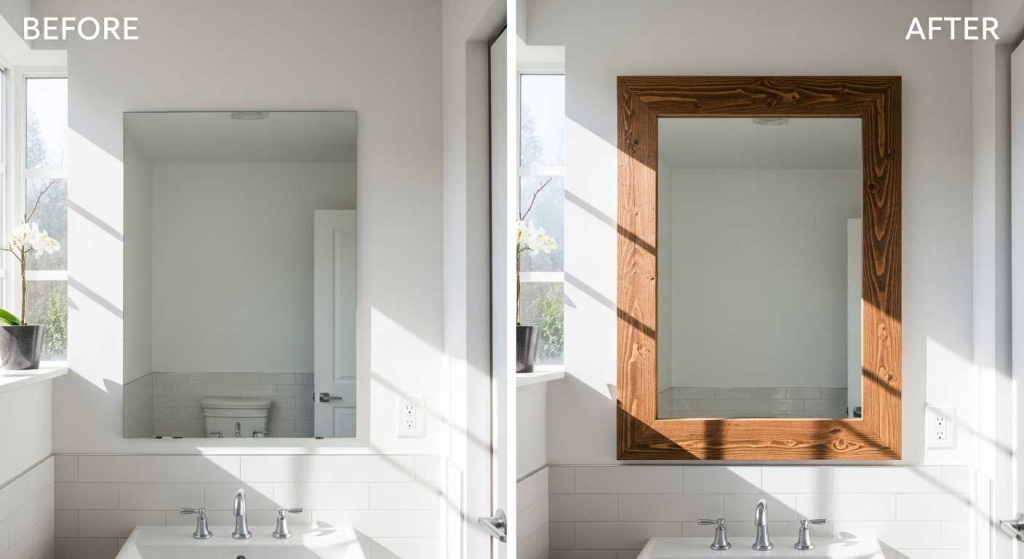
Nothing upgrades a room faster than a DIY framed mirror makeover done at home. With peel-and-stick wood trim and rope edging, plain glass becomes budget-friendly decor that looks boutique yet costs pocket change.
The process relies on scrap molding, craft paint, and a glue gun, letting you try out creative mirror hacks without power tools or carpentry classes. Keep reading to see how these tricks slide straight into any plan for affordable home decor.
Choosing the Right Mirror for Your Project
A mirror turns blank wall space into instant depth and sparkle, but the pick needs thought. Match the mirror’s shape and size to the room’s proportions: a tall rectangle mirror stretches a narrow hallway, while a big round piece softens busy gallery walls.
Wood or metal frames can echo finishes already in the room for stylish DIY mirrors that feel intentional. Shop flea markets, hardware stores, and online clearance bins for affordable mirror choices.
Budget-Friendly Materials: Where and How to Find Them
Getting budget materials for DIY mirror projects starts with a loop through stores like Habitat for Humanity ReStore for scrap lumber or pallets, perfect for cutting borders. Thrift aisles hide sturdy reclaimed frames needing only a light sand before painting.
Grab “oops” or mis-tint gallons from the hardware paint shelf for pennies on the dollar, then hunt clearance bins for discount decor supplies like ribbon trim or stick-on gems. Cap it off with flea-market knobs as hangers and the mirror looks boutique-worthy.
Easy Paint and Stencil Frames
A craft-store stencil and a tester pot of acrylic paint turn a plain mirror into custom art in under an hour. For beginner-friendly DIY stencil mirror frames, wipe the glass clean, mask the edges with painter’s tape, and roll on a quick primer.
When dry, mist the stencil with low-tack adhesive, press it flat, then pounce on color in whisper-thin layers to prevent bleed. Do not forget to seal the pattern with a clear acrylic spray.
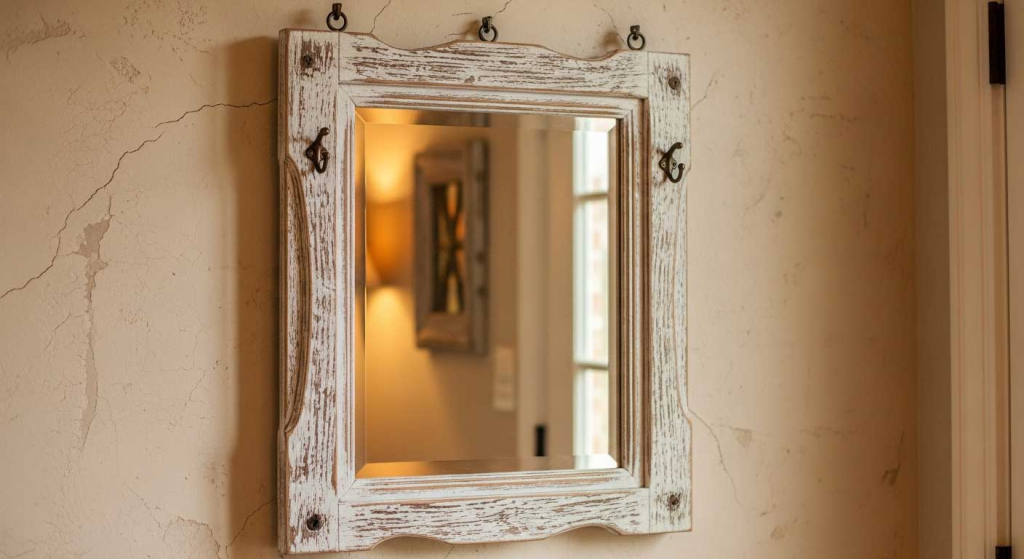
Rustic Charm with Reclaimed Wood
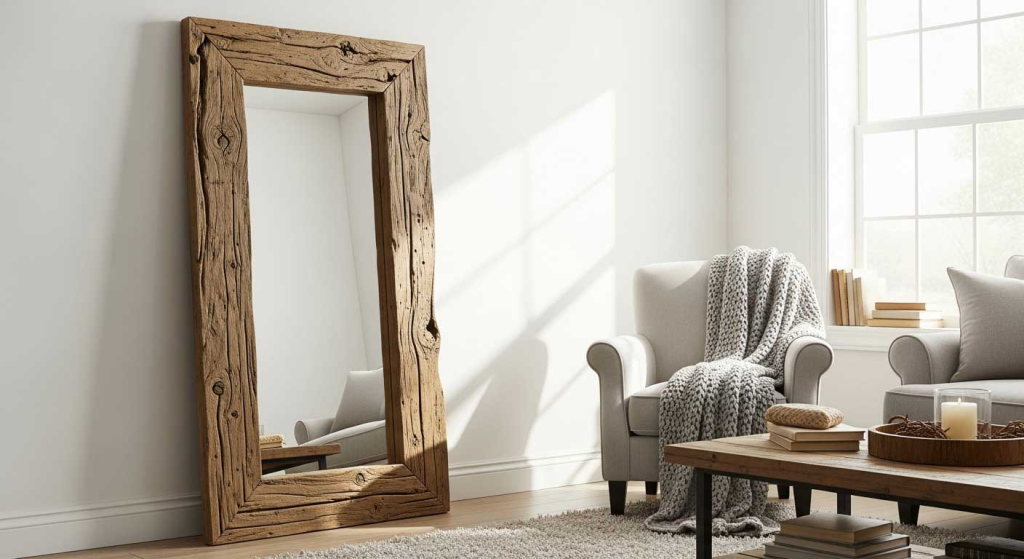
Turn scrap boards into warmth: sand rough edges, keep nail marks for character, then measure each piece to fit your glass and fasten with wood glue and nails. Finish the reclaimed wood mirror with a matte polycrylic so grain stays the star.
For heavier frames, pocket screws add reinforcement. Nail holes and saw cuts read as intentional texture, giving those rustic mirror frames the well-traveled look store-bought pieces fake. Leftover slats fuel other DIY pallet projects, like matching shelves that echo the mirror’s vintage vibe.
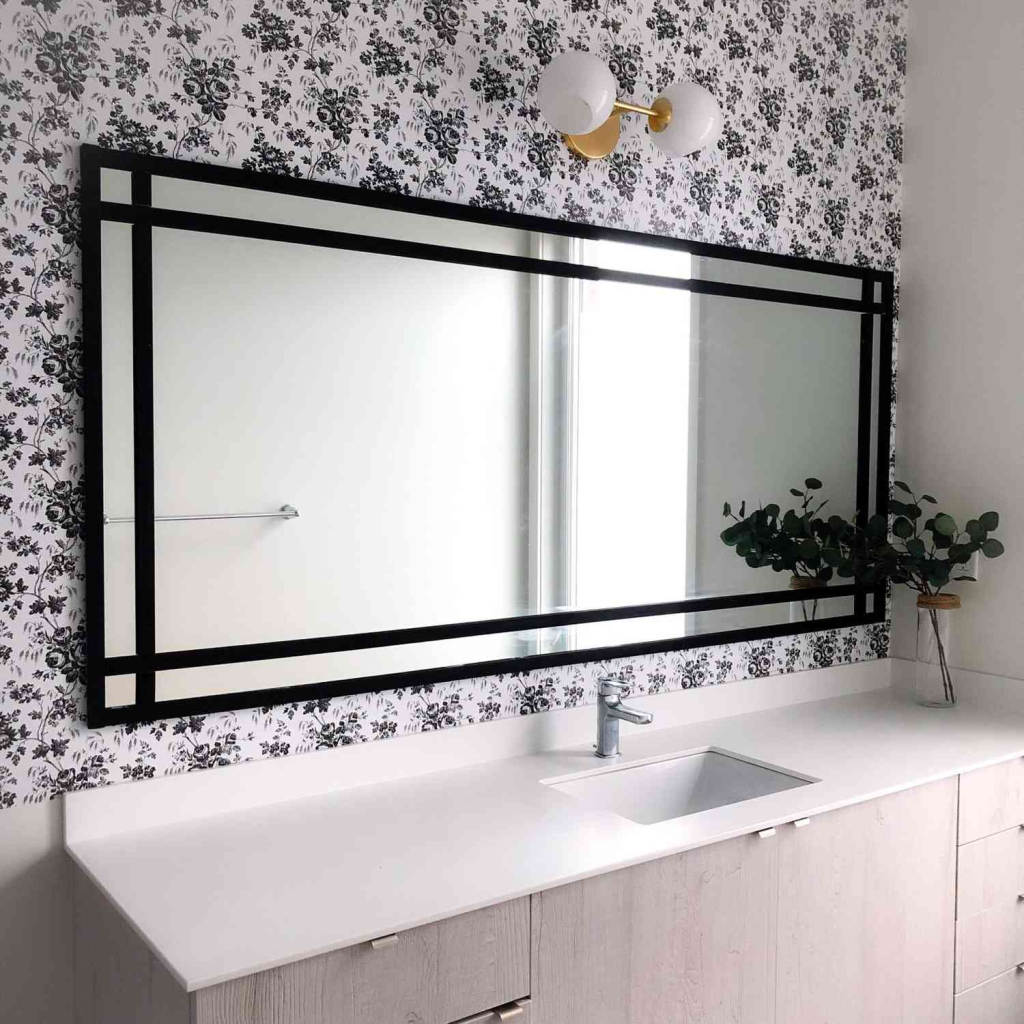
Modern Minimalist Frames
Running a trim of thin aluminum around a bare mirror instantly gives it gallery-worthy polish without draining the wallet. For a modern DIY mirror look, stick self-adhesive stainless-steel tape or peel-and-stick metal molding straight onto the glass.
Prefer paint? Lightly sand, then mist the edge with chrome spray to fake brushed-nickel lines that read as metallic mirror frames. Keep borders pencil-thin to let reflection dominate, delivering crisp minimalist mirror decor that suits bathrooms and bedrooms alike.
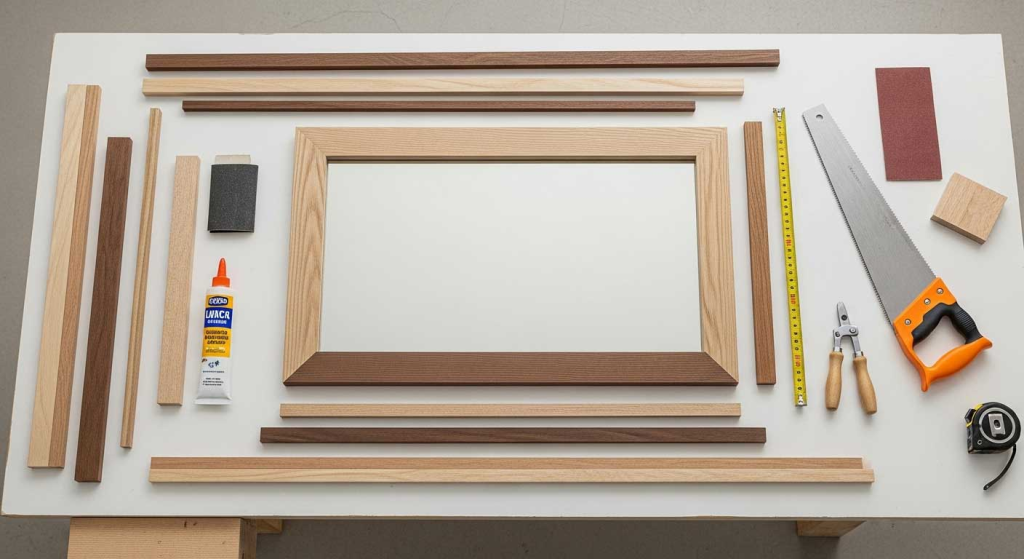
Step-by-Step DIY Mirror Framing Guide
Fresh trim can turn a builder-grade mirror into a focal point. Measure height and width, transfer numbers to primed molding, and cut 45-degree miters so corners meet. Dry-fit the pieces, then glue joints and clamp.
Apply mirror-safe construction adhesive one inch inside the frame’s back, press onto glass, and tape until cured. L-brackets or clipped rabbets add extra hold before paint touch-ups. Follow this mirror framing tutorial and finish strong with a reliable mirror installation.
Adding Personality: Decorative Techniques and Finishes
Grab that thrift-store mirror and let it tell a new story. Start with decorative mirror finishes like faux antiquing, misting a bleach-water mix and topping with mirror spray paint for instant vintage character.
Layer color with texture painting techniques such as dry brushing or raised stencils for subtle ridges that catch light and make your handiwork pop. Finally, lean into personalized mirror decor by gluing resin appliqués, mosaic tiles, or small brass corners around the frame for wallet-friendly flair.
Safe Installation and Maintenance Tips for DIY Mirrors
For mirror installation safety, pick heavy-duty D-rings or French cleats rated above the mirror’s weight and drive screws into wall studs. If studs don’t line up, pair toggle or molly anchors with the hardware for secure wall mounting.
Keep that glass pristine with weekly spritzes of vinegar-water, wiped top-to-bottom with a microfiber cloth, and tackle edge spots early with rubbing alcohol.
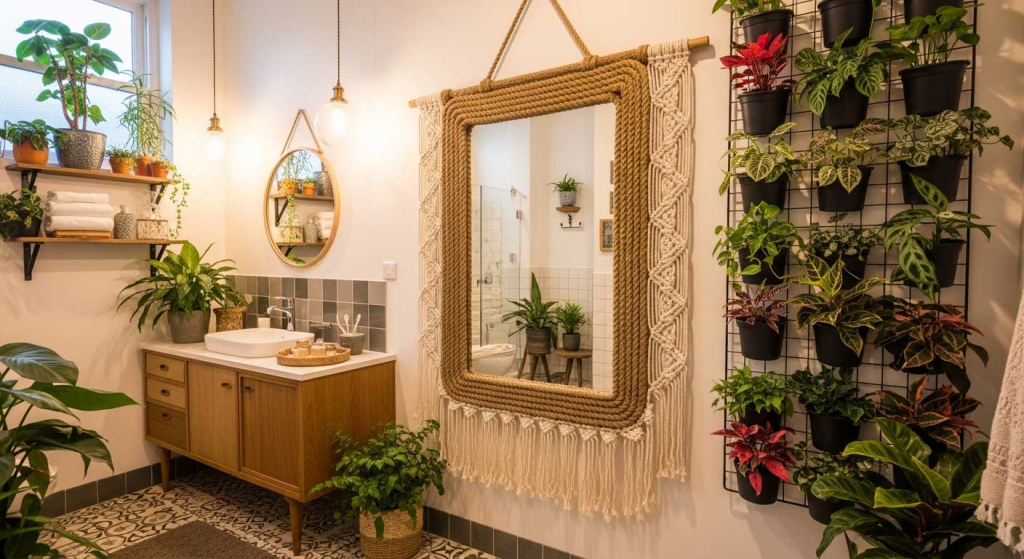
Inspiring DIY Framed Mirror Ideas and Real-Life Examples
Get a yard-sale mirror, sand the frame, then brush on matte black for a minimalist vibe. Vintage lovers can decoupage floral wallpaper onto ornate thrift frames for budget French-country charm.
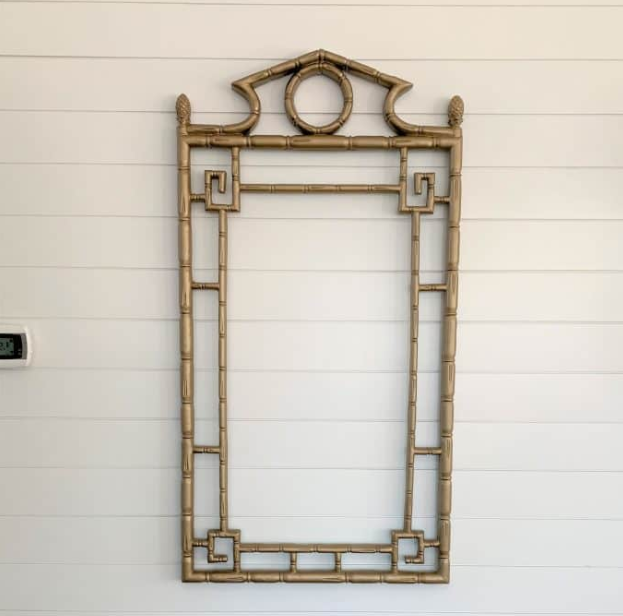
For boho spaces, faux-paint bamboo trim in warm tan and lean the mirror against the wall.
Scroll through DIY mirror examples online and bookmark creative mirror inspiration that fits the room. Layer these trendy mirror hacks until the result feels uniquely yours.
Common DIY Mirror Framing Mistakes and How to Avoid Them
Cut the trim too short once and the frame never sits flush again. Measure twice, mark clearly, and test-fit before gluing. Pick mirror-safe adhesive. Generic construction glue can stain the backing. Screw-in clips or weight-rated mounting tape support heavy glass better than light caulk beads.
Seal raw wood first so trapped moisture doesn’t ghost the edges. Spot these mirror DIY mistakes early, avoid framing errors, and lock in DIY mirror best practices that keep budget frames bright for years.
Creative and Affordable Mirror Display Ideas
Framed reflections can double as wall art. Hang a tight grid of small thrifted pieces to build budget DIY mirror galleries on a blank wall. Mismatched frames add charm. Lean a tall salvaged mirror in a dim corner to bounce light and make ceilings feel higher.
Cluster three flea-market mirrors above the sofa for instant sparkle. These affordable mirror arrangements refresh a room while keeping wallets happy.
Conclusion: Reflecting Your Unique Style on a Budget
Rolling up sleeves for a quick frame refresh pays off every time. Those chipped thrift finds become personal style mirrors that echo the room’s palette while costing next to nothing.
Paint sticks, rope, or scrap trim keep the project under the umbrella of affordable DIY decor, and the ideas above prove that even odd shapes welcome a glow-up.
Keep experimenting with new creative mirror projects, snap your mirror glow-up, and post your before and after in the comments below!


1 thought on “DIY Framed Mirror Hacks: Easy Elevation on a Budget – Try Now – Tips Ideas Inspiration”